Sunday, December 15, 2013

Project 365 #14. Malabar Hills

View from top of the Malabar Hills. Girgaon Chowpatty in the left to Nariman Point in the right.
Pic shot on 14-dec-2013.

South Mumbai view from Malabar Hills 

Saturday, November 3, 2012

The most breathtaking panorama

Browsing though the web , i found these rare n breathtaking panoramas


Earth from the edge of space!


more details here: http://www.airpano.com/360Degree-VirtualTour.php?3D=Stratosphere

Mount Everest
More details : http://www.airpano.com/360Degree-VirtualTour.php?3D=Everest-Nepal

Great Scene.. isn't it?

Thursday, August 30, 2012

HDR: High Dynamic Range Photography

Dynamic Range refers to the range of light intensities that can be accommodated by vision, ie the various lights and darks that can be viewed simultaneously. Dynamic range is an everyday phenomenon: when you enter a dark room from a well lit room- your eyes goes blackout for a moment. As a photographer, the problem of Dynamic range really comes in picture when you're shooting in very bright or very dark surrounding. For a matter of fact, the dynamic range of human eye is 10,000:1 (our eye can distinguish 10,000 different intensities of light at the same time); a DSLR has a dynamic range of around 400:1 (which is much much lower than our eyes) and the monitor/ printed photograph has further low dynamic range than rest. In other words, our eyes can accommodate up to 18 stops of light, whereas a digital camera can accommodate up to 10-12 stops and monitor/ printed photograph can accommodate even less. 
To further simplify your concept, I am posting some of my photographs that I took in an auditorium last night.  3 photos were taken from the same nodal point in different exposures(-2. 0, +2). Finally they were combined to produce the final high dynamic range photograph.
The most commonly used and the most popular HDR softwares  are:
  • Adobe Photoshop(File>>Automate>> Merge to HDR Pro)
  • Photomatrix Pro (Software site: www.HDRsoft.com)
For more insights into the concept you can refer to: http://www.stuckincustoms.com/hdr-tutorial/
for any other queries or suggestions, just reply back or mail to jishnuclicks@gmail.com

Saturday, August 25, 2012

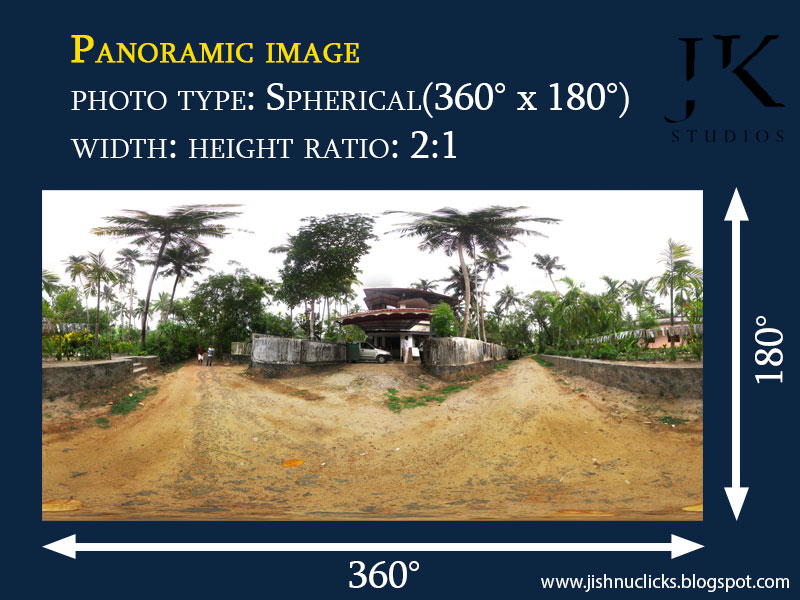
Making a 360 degree panorama


So after quite a gap, I'm back with my tutorials... and I swear its just got better. Today I'm going to teach you how to shoot and stitch a professional quality 360 degree panorama and all you need is a digital camera(any digital camera with manual settings) The best thing about this tutorial is that you can apply the same techniques with any digital camera you have and for any number of photos(you can combine 100's of photos), and create panoramas as big as gigapixel. A tripod is naturally preferred, but you can always find a way around it(if u you don't have a tripod, check out this link: http://www.philohome.com/tripod/shooting.htm ).  

To start off with here are the basic equipment you need:

  1.  Digital Camera (in manual mode)
  2.  Tripod
  3.  Compass (to know the directions esp useful when you're planning to upload your work on the web)

Software required:
  1. Adobe Photoshop: No photo is complete without photoshop, but the truth is that photoshop cannot stitch a 360 degree panorama. We need photoshop to clean up and refine the stitched panorama we get from
  2. AutoPano Giga: Its gotta be the best panorama stitching software currently available in market (though many claim PTGUI as an equally good software stitching software, but APG's simple user interface and ease of use makes it my personal favourite). As the name suggests, the software can even be used to stitch very high resolution images(gigapixel images). For more details about the software , check out their website: http://www.kolor.com 
  3. KRpano tools: these are small tools and droplets which are helping to automatically prepare the panoramic images for viewing and making them ready-to-use. It also incorporates the krpano Viewer, which is a small and very flexible high-performance viewer for all kind of panoramic images and interactive virtual tours. For details and download check their website:  http://krpano.com/
The A to Z of panorama shooting and editing has been explained in the following 2 videos, the first one I found in the net (the one I watched while learning panorama shooting). Though it explains both shooting and stitching part, but I rather want you to follow the 2nd video( the one I prepared, after dealing with all sorts of problems in the previous workflows).

Once you've created your panorama, you can be uploaded to  www.360cities.net . But keep in mind that for free account users, the site accepts panos of resolution of 6000x3000, 8000x4000 or maximum 9256x4628 only. 

Video #1   Shooting a panorama


Video #2  Post Production Techniques


Best of luck for your panoramic exploration and do please share your experiences with me. Or if you  have any query, feel free to ask it here or mail me at jishnuclicks@gmail.com

Tuesday, July 17, 2012

T Shirt designing: Tips

After facing quite a lot of criticism over the previous design, I made sure that I covered all the shortcomings of the previous design and created this one. This is my 4th T Shirt design, so now I roughly know how to approach and what to expect it in its final output. Knowledge of Corel Draw is recommended coz the final design is made in Corel Draw. Even if you don't (like me!), you can create your design in Photoshop/Paint Shop Pro and hand over the design to the printer. Make sure you follow these basic things while designing:

  • Mind your colors: remember that you have only limited color palettes at your disposal. Shades of similar color might not get printed exactly the way you want it to be. So use contrasting and bright colors for your designs. Also the printer would charge you additional cost for every color you use in your prints (irrespective of the print area of that color). So I would suggest you to limit the use of colors in your design to 1 or 2 colors and use them in a contrasting manner to get the best look for your design.
  • Make a big picture: If your design has plenty of graphics, make sure your file dimension is big enough so that you get best resolution while printing. For example: 4000x4000 pixels @ 200dpi would give you a good sharp output without any need for upsampling your image.
  • T shirt color: Always the first thing to consider while designing is the color of the T shirt coz it would act as the background color for your design. Though you can choose a Shirt of any color which is available in the market, but if you're confused over the best color to select, then better go for white, grey or black. They  are the universal colors and by universal I mean they're the best for all practical purposes and suits on all skin tones.
  • Positioning of your design: Make sure you place your main subject/highlight to the 'chest' (thats coz people have this tendency to place the design at the tummy, never do it.)

However these are just some guidelines and the final look you your shirt would depend on your sense of design and etiquette. If you have any queries or suggestions, feel free to express your thoughts here itself or mail me at jishnuclicks@gmail.com


Sunday, July 1, 2012

Photo Market in Delhi...


For those seeking best deals and varieties in  photographic equipment in Delhi, this is the place to look out- Chandni Chowk photo market. I've attached a map locating the best deal shops in their respective category. They've been selected on my own personal experience.Its only after 3 visits and a comprehensive search of the whole market that I chose these shops. Memory cards, card readers, chargers and batteries are found in almost all shops and at same wholesale rate. Almost every item is sold at wholesale rate except tripod, so no point bargaining on those items.
Some shops to specially look out for:
  1. Digital Point: they deal in cameras, lens, polarisers, filters, studio lights, tripods etc. Contact Mr. Kunal Magan @ 9810208094 before a visit. A 10 min chat with this expert shopkeeper can prove really helpful in you selecting the best accessories for ur photographic style.
  2. Standard Album company: A one stop shop for all ur print paper and cartridge needs. They had some cartridges which were available nowhere else in the market. Contact Mr Bhushan Kumar @ 9312606852, 9311106852, 9873063047
  3. Vardhaman Traders: they had a great variety of camera pouches and bags; and i'm sure they have one for ur cam as well. Contact Mr. Vinod Jain @ 9811109449
  4. Khanna & Co.: specialists in photo frames and I just loved the variety and designs of their frames. Contact Mr. Rahul Khanna @ 9350910011
I think that pretty much sums up almost all ur photographic needs,however if you still have any doubts or queries, do feel free to ask them here at my blog or mail me at: jishnuclicks@gmail.com

Wednesday, June 13, 2012

Some panos of my school...

Project KPS: was undertaken on 19th Feb 2012(Kerala School Grand Fete day)
Special thanks to my buddies- Gaurav Kumar for lending me some of his equipments and Sooraj V Nair for assisting me in the project... It took around three months and lot of headache to finish the project

School Inside

Kerala School inside in New Delhi

School Entrance

Kerala School Entrance in New Delhi


School Canteen

Kerala School canteen side in New Delhi


SMS Marg(Road that leads to school)

Srimant Madhavrao Scindia Marg in New Delhi